Troubleshooting
How to Install an Operating System (OS) Using IPMI
March 9, 2017
7 min read


Step 1 - Login to the target system by using IPMI web GUI (Java is required).
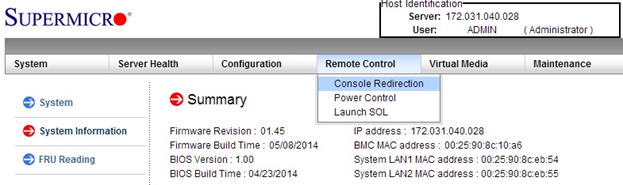
Step 2 - Go to the tab “Remote Control” and select “Console Redirection”
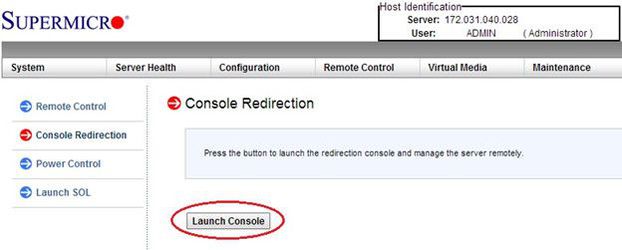
Step 3 - Click on “Launch Console”
Step 4 – A small file “Launch.jnlp” will be downloaded, run the file and the remote window will be opened
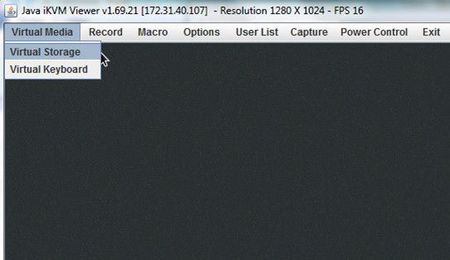
Step 5 – In the remote window, go to “Virtual Media” and select “Virtual Storage”
Step 6 – Select “Logical Drive Type”, typical drive type is “ISO”
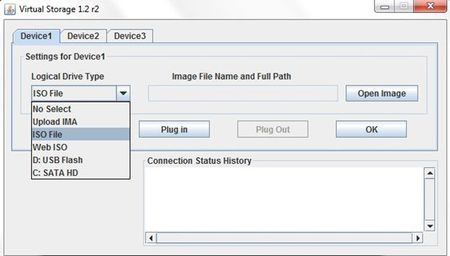
Step 7 – Click “Open Image” to select the image file location, could be local in your PC or network shared drive.
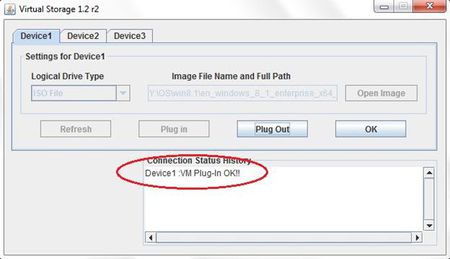
Step 8 – Click “Plug in” and then click “OK” to mount the virtual drive, Device connection is now plugged-in, the setup is now done.
** Click "Plug out" to unmount it
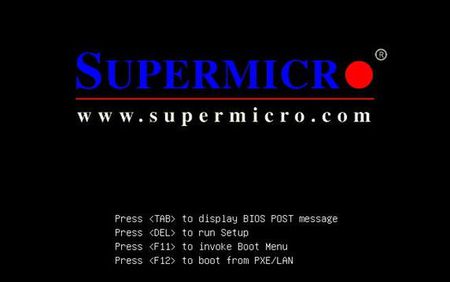
Step 9 – Reboot the system. Press <F11> when the BIOS bootup option display
Step 10 – Select the boot device to “Virtual CDROM”
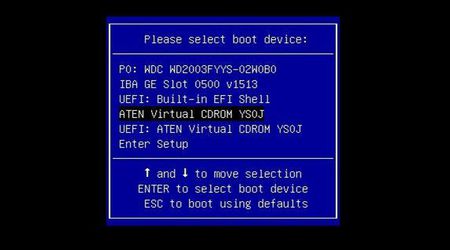
Step 11 – System will boot up from the virtual CD-ROM and now you can start the OS installation
Step 1 - Login to the target system by using IPMI web GUI (Java is required).
Step 2 - Go to the tab “Remote Control” and select “Console Redirection”
Step 3 - Click on “Launch Console”
Step 4 – A small file “Launch.jnlp” will be downloaded, run the file and the remote window will be opened
Step 5 – In the remote window, go to “Virtual Media” and select “Virtual Storage”
Step 6 – Select “Logical Drive Type”, typical drive type is “ISO”
Step 7 – Click “Open Image” to select the image file location, could be local in your PC or network shared drive.
Step 8 – Click “Plug in” and then click “OK” to mount the virtual drive, Device connection is now plugged-in, the setup is now done.
** Click "Plug out" to unmount it
Step 9 – Reboot the system. Press <F11> when the BIOS bootup option display
Step 10 – Select the boot device to “Virtual CDROM”
Step 11 – System will boot up from the virtual CD-ROM and now you can start the OS installation